Add 3D models to your Elementor page using
In this quick tutorial we will add a 3D module to an Elementor page using <model-viewer> a library to “Easily display interactive 3D models on the web & in AR”.
Quick way
In the first part we will use the HTML widget with external styles and script to embed the 3D model. This way is very quick and you can basically copy & paste the example from the <model-viewer> page.
The quick start example code looks like this:
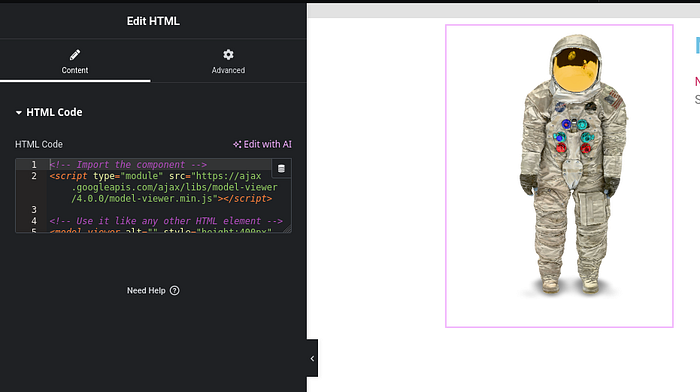
<!-- Import the component -->
<script type="module" src="https://ajax.googleapis.com/ajax/libs/model-viewer/4.0.0/model-viewer.min.js"></script>
<!-- Use it like any other HTML element -->
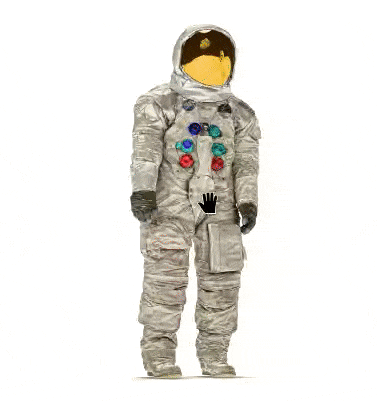
<model-viewer alt="Neil Armstrong's Spacesuit from the Smithsonian Digitization Programs Office and National Air and Space Museum" src="shared-assets/models/NeilArmstrong.glb" ar environment-image="shared-assets/environments/moon_1k.hdr" poster="shared-assets/models/NeilArmstrong.webp" shadow-intensity="1" camera-controls touch-action="pan-y"></model-viewer>and contains all basic items we’ll need. At first we will need to download the 3D model, HDR file and poster image (preview image):
- https://modelviewer.dev/shared-assets/models/NeilArmstrong.glb
- https://modelviewer.dev/shared-assets/environments/moon_1k.hdr
- https://modelviewer.dev/shared-assets/models/NeilArmstrong.webp
Of course you can use your own 3D files, make sure to check out https://modelviewer.dev/docs/faq.html#entrydocs-general-questions-formats or use Blender to export glb files.
To upload these files to WordPress we’ll need to allow glb and hdr files. Open your functions.php file and add:
function custom_mime_types($mimes) {
  $mimes['glb'] = 'model/gltf-binary';
  $mimes['hdr'] = 'application/octet-stream';
  return $mimes;
}
add_filter('upload_mimes', 'custom_mime_types');
If you don’t have one yet it is highly recommended to create a Child theme first. Check e.g. https://www.wpbeginner.com/wp-themes/how-to-create-a-wordpress-child-theme-video/ how to do it.
After that you can upload all three files to WordPress:
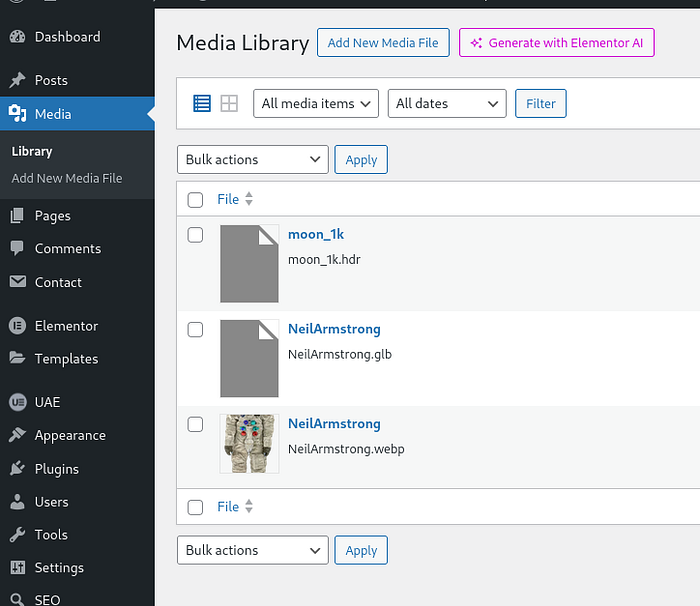
Quick tip: if you want to organize your media library into different folder I highly recommend using Real Media Library! Use code “MEDIA” to get 10% discount if you want to use the pro version.
To generate our final HTML code we need to copy each filename and paste it into the <model-viewer> code.
<!-- Import the component -->
<script type="module" src="https://ajax.googleapis.com/ajax/libs/model-viewer/4.0.0/model-viewer.min.js"></script>
<!-- Use it like any other HTML element -->
<model-viewer
alt=""
src="[GLB_FILE]"
ar
environment-image="[HDR_FILE]"
poster="[POSTER_FILE]"
shadow-intensity="1"
camera-controls
touch-action="pan-y"
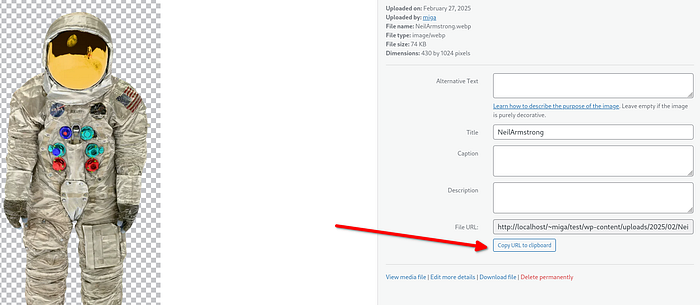
></model-viewer>Open the poster webp file, click on “Copy URL to clipboard” and replace [POSTER_FILE] with that path
Do this for all three files and the final code will look like this:
<!-- Import the component -->
<script type="module" src="https://ajax.googleapis.com/ajax/libs/model-viewer/4.0.0/model-viewer.min.js"></script>
<!-- Use it like any other HTML element -->
<model-viewer
alt=""
src="http://localhost//wp-content/uploads/2025/02/NeilArmstrong.glb"
ar
environment-image="http://localhost//wp-content/uploads/2025/02/moon_1k.hdr"
poster="http://localhost//wp-content/uploads/2025/02/NeilArmstrong.webp"
shadow-intensity="1"
camera-controls
touch-action="pan-y"
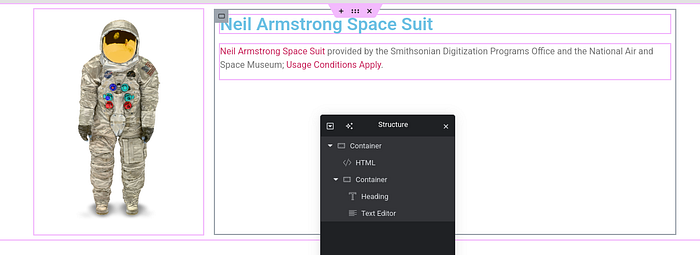
></model-viewer>Inside your Elementor page you can add a HTML widget and paste the code:
If you want to change the height of the element you can add
<model-viewer style="height:400px" ....as a parameter into the <model-viewer> node.
That’s it! You have a 3D model in your page that even has AR support when you view the page with a phone. For more <model-viewer> properties you can read their documentation: https://modelviewer.dev/examples/augmentedreality/index.html .
Inside Elementor you can put all the normal elements around the HTML widget with your 3D element:
Advanced way
The better way is to create a custom module for this so you can reuse it very easy in different places.
To get a basic widget setup you can use the example file from: https://developers.elementor.com/docs/getting-started/first-addon/ and change the parts as needed.

Create widget files
Open your functions.php file again and add:
function register_3d_widget( $widgets_manager ) {
 require_once( __DIR__ . '/3dwidget.php' );
 $widgets_manager->register( new \Elementor_3d_Widget() );
}
add_action( 'elementor/widgets/register', 'register_3d_widget' );
Then create a file called 3dwidget.php in your child theme root folder (where the functions.php is located) and add this code:
<?php
class Elementor_3d_Widget extends \Elementor\Widget_Base {
public function get_name(): string {
return '3d_widget';
}
public function get_title(): string {
return esc_html__( '3D Widget', 'elementor-addon' );
}
public function get_icon(): string {
return 'eicon-code';
}
public function get_categories(): array {
return [ 'basic' ];
}
public function get_keywords(): array {
return [ 'hello', 'world' ];
}
protected function register_controls(): void {}
protected function render(): void {}
protected function content_template(): void {}
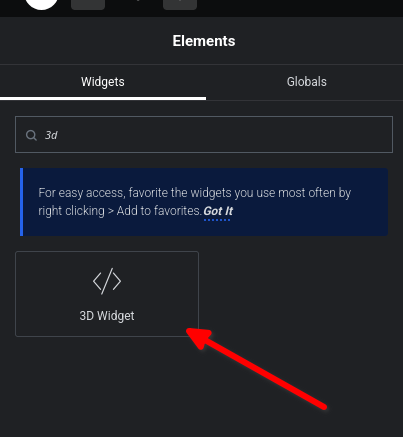
}In you editor you can find your own 3D Widget now:
Of course it is still empty and doesn’t render anything to the page. We need to add some controls to the widget so we can pick our files. For this you’ll have to replace the register_controls() method with this code:
protected function register_controls(): void
{
$this->start_controls_section(
'content_section',
[
'label' => esc_html__('Content', 'textdomain'),
'tab' => \Elementor\Controls_Manager::TAB_CONTENT,
]
);
$this->add_control(
'file_3d',
[
'label' => esc_html__('Choose 3D file', 'textdomain'),
'type' => \Elementor\Controls_Manager::MEDIA,
'media_types' => ['model/gltf-binary'],
]
);
$this->add_control(
'file_hdr',
[
'label' => esc_html__('Choose HDR file', 'textdomain'),
'type' => \Elementor\Controls_Manager::MEDIA,
'media_types' => ['application/octet-stream'],
]
);
$this->add_control(
'file_image',
[
'label' => esc_html__('Choose Image', 'textdomain'),
'type' => \Elementor\Controls_Manager::MEDIA,
]
);
$this->end_controls_section();
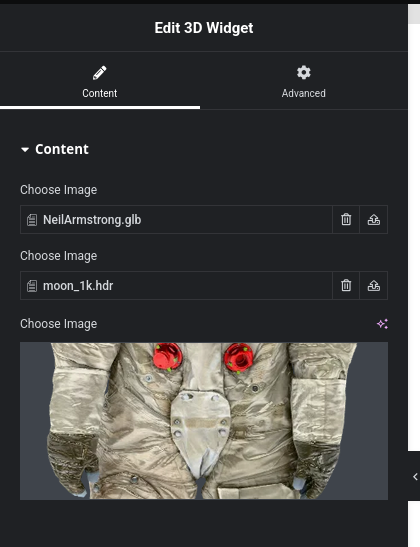
}Now your widget has three properties and you can select your 3D file, HDR image and poster image:
To output the <model-viewer> code we need to change render() method. Inside that method we can get the selected properties and put them into the HTML code:
protected function render(): void
{
    $settings = $this->get_settings_for_display();
    if (empty($settings['file_3d']['url'])) {
        return;
    }
    $file_3d = $settings['file_3d']['url'];
    $file_hdr = $settings['file_hdr']['url'];
    $file_image = $settings['file_image']['url'];


    echo '<script type="module" src="https://ajax.googleapis.com/ajax/libs/model-viewer/4.0.0/model-viewer.min.js"></script>';
    echo '<model-viewer alt="" src="'.esc_url($file_3d).'" ar environment-image="'.esc_url($file_hdr).'" poster="'.esc_url($file_image).'" shadow-intensity="1" camera-controls touch-action="pan-y" ></model-viewer>';
}
That’s it! You have your own widget now that renders the 3D file you’ve selected.
You can extend the widget as you want and e.g. add a Number Control for the height or something else. Check https://developers.elementor.com/docs/editor-controls/ for available controls.
Optimizations
If you don’t want to have external requests you can download the <model-viewer> JS file, put that into your theme and load it with the examples from https://developers.elementor.com/docs/widgets/widget-dependencies/
This is not part of this short tutorial but I recommend doing that if you want to minimize external requests.